OTP usage has sharply increased in the last few years. From Banks to Social Media platforms, almost every platform relies on OTP (One-Time Password) facility for security and authentication. Net Banking facility, Corporate Logins, Online Platform Logins, Social Media Platform logins, and every other online platform use this OTP functionality.
Since the spike in OTP usage, you receive many OTPs on a daily basis. These OTPs are only for one-time use. However, the majority of us are very lazy when it comes to deleting OTPs from the inbox. Hence, every OTP message which is useless within a couple of minutes of receiving stays in your inbox for an indefinite period.
What is OTP?
The OTP stands for One Time Password. To make your online activities more secure, digital platforms use the Two-Factor Authentication process. In the Two-Factor you need to enter your mobile phone number while login in. The online system will generate the One Time Password (OTP) and send it to your mobile phone as an SMS. You need to enter the OTP on the login screen to authenticate your mobile phone and identity.
OTPs and Two-Factor Authentication are comparatively more secure than the conventional login system. In the conventional system, there’s a static password that can be used multiple times. While in the Two-Factor Authentication, OTPs are used that can be used only once and are valid for a few minutes only.
Nowadays, almost every online platform uses Two-Factor Authentication to add an extra layer of security for online activities on their platforms.
People Also Read – Bypass Online SMS Verification
Detailed Guide To Auto Delete OTP Messages in 24 Hours on Android
As you know there’s no other option for you to not have OTPs on your mobile phone. So, the only thing you can do is streamline and automate the process of deleting OTP messages from your mobile phones. To solve this problem using one of the official services of Google, DiGiTAL BiRYANi has prepared a step-by-step guide to Auto Delete OTP Messages After 24 hours on your Android Mobile Phone. We’ve used Google Messages services to Auto Delete OTP Messages in 24 Hours on Android Mobile Phones.
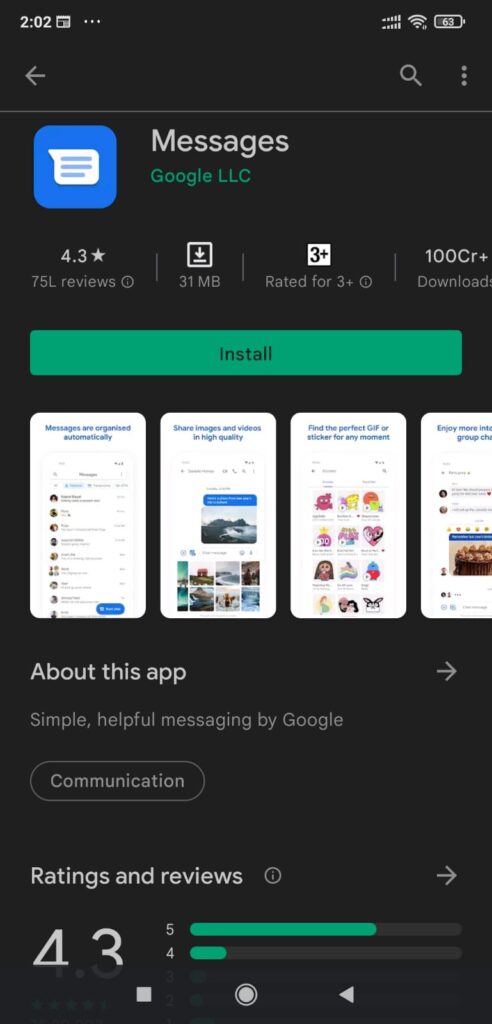
- Download and Install Google Messages from the play store on your Android Smartphone. If the App is already present on your Android mobile, update it with the latest version available on the Play Store.

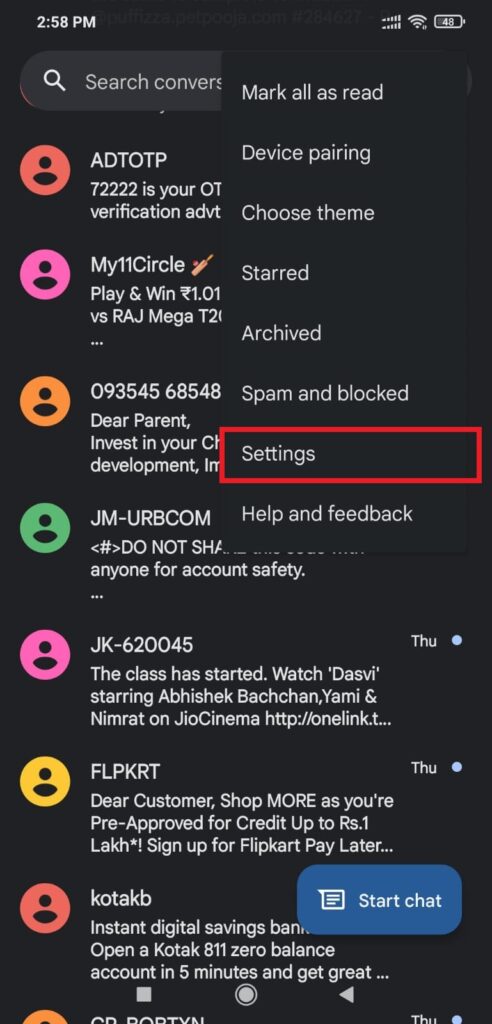
- Open the Google Message App on your smartphone. Make the App default messaging App and click on the three dots in the top-right corner.

- You’ll see various options on the screen. Select Settings from those options.

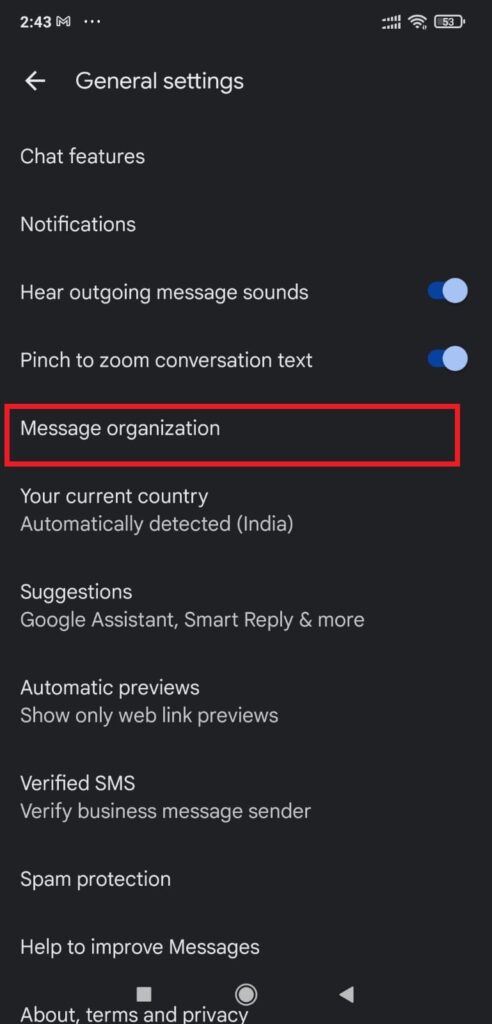
- Go to the General Settings option from the Settings page.

- After that tap on the Message Organization option as shown in the screenshot posted below.

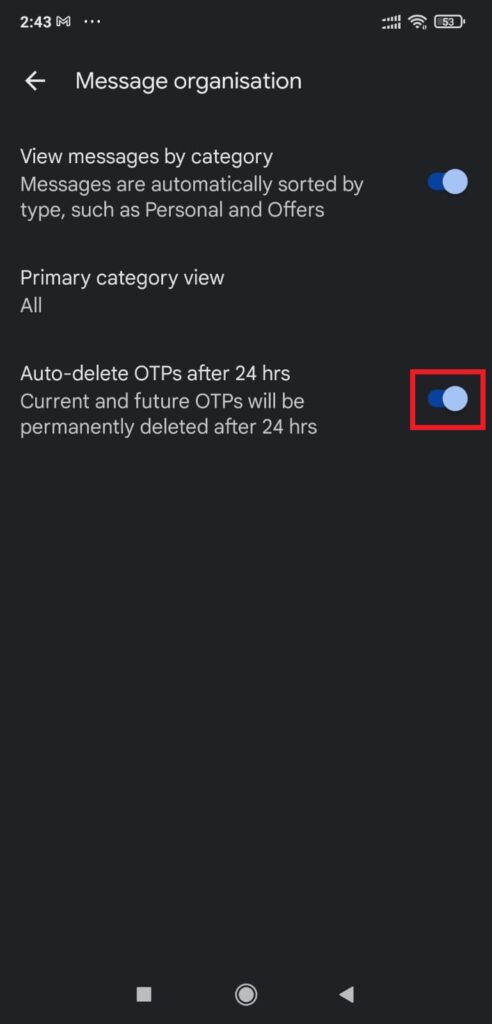
- On the Message organization page, enable the toggle for Auto-delete OTPs after 24 hours. If that option is non-editable, enable the View Messages by Category option, and after that enable Auto-Delete OTPs After 24 Hours option.

That’s how you can Auto Delete OTP Messages Within 24 Hours on Your Android Smartphone and keep your inbox clean and organized.
Frequently Asked Questions (FAQs)
Is Two Factor Authentication 100% safe and secure?
No. It is not a 100% safe and secure method. It works on the OTP system. So, if someone gets access to your SIM card, that entity can get access to OTPs. In such cases, your security is at risk. However, it is surely a better option compared to conventional static password authentications.
Apart from Two-Factor Authentication, what is another good way of online security?
The best way of online security is to create a robust, secure, and unique password for your online presence. A strong password will eliminate a lot of online security threats. Here’s a guide to creating Strong, Unique, and Unbreakable Passwords.
Conclusion
We hope that with the help of this guide, our esteemed readers won’t be having difficulties managing their inboxes on Android Smartphones. This guide will help everyone Auto Delete OTP Messages After 24 hours on Android Smartphones. Try this amazing trick, and share your valuable feedback with us to help us serve you better and more.


Pingback: How to Find MAC Address on Android Phone • 4 Easy Tricks